2-Day Meal Plan 4

Serves 4 | Difficulty: Easy

Share this

Meal Plan Cover featuring Air Fryer Pork Belly Char Siu with Rice and Greens, and Steamed Salmon with Sweet Soy Sauce and Scallions

Two classic Cantonese dishes in one meal plan: Pork Belly Char Siu and Steamed Salmon with Sweet Soy Sauce.

This might be my favorite combination yet! Could this be the Chinese version of surf ‘n turf?

While these recipes may seem complicated at first glance, they are actually quite simple to make at home!

For detailed tips on cooking, shopping, thawing, and substitutions, I’ve provided extensive write-ups for each recipe in their respective posts. You can find the links in the “meal” section below for your convenience.

As always, the shopping list is available at the end of the post. You can also access it using the buttons above or in the sidebar of your screen if you’re on your phone.

If you’ve tried this meal plan or the recipes, please share them with your friends or leave a comment. Thank you, and enjoy!

First time here?

Check out my Getting Started guide to learn how to use this meal plan.

Prep Summary

  • 2 lb gai lan end of stalks trimmed and blanched for 2 minutes
  • 10 cloves garlic minced
  • 4 inches ginger halved, peeled, and julienned into thin strips
  • 2 knobs (about 1/2 inch a knob) ginger grated
  • 2 stalk scallions cut into 2-inch length and julienned into thin strips
  • 1.5 lb skinless pork belly cut into 2 long strips
  • 1 lb gai lan end of stalks trimmed and blanched for 2 minutes
  • 7 cloves garlic minced
  • 1 knob (about 1/2 inch a knob) ginger grated
  • 1.5 lb skinless pork belly cut into 2 long strips
  • 1 lb gai lan end of stalks trimmed and blanched for 2 minutes
  • 3 cloves garlic minced
  • 4 inches ginger halved, peeled, and julienned into thin strips
  • 1 knob (about 1/2 inch a knob) ginger grated
  • 2 stalk scallions cut into 2-inch length and julienned into thin strips

Blanching vegetables serves 2 purposes: (1) It prevents loss of flavor, color, and texture—extending the “life” of the vegetable throughout the week, and (2) it gives us a head start in the cooking process for stir-fries. Stir-frying generally only takes 5 minutes. If you start from raw, some pieces won’t cook as evenly as others (especially hardy vegetables like broccoli). Blanching pre-cooks each piece of veggie so you will have a consistent tasting stir-fry every time. This is a well-known technique used in many Chinese restaurants!

Here’s how:

  1. Bring a large pot of water to a rolling boil (about 6 cups) and add 1 Tbsp kosher salt. Prepare an ice bath in a large bowl on the side.
  2. Blanch vegetables for the time indicated on the recipe/prep summary. The countdown starts when the water comes back to a boil, so don’t overcrowd! Once done, immediately transfer the vegetables with a sieve to the ice bath for a few minutes to stop the cooking process.
  3. When vegetables have cooled, drain well and transfer to a storage container or Ziploc bag. Use a salad spinner to remove excess water for leafy greens or use clean hands to squeeze out remaining water.
  4. You can repeat this process with all the vegetables using the same pot of water. Bring water back to a rolling boil before starting a new batch. Replenish ice to ice bath as needed to keep water cold.

Chopped Aromatics

Store in an air-tight container in the fridge to keep maximum freshness. Use them within 7-10 days. If you suspect it has gone bad – the color has changed (e.g. turns brown), there is visible mold, the texture is mushy – toss them. Always err on the side of caution to avoid food poisoning.

Chopped Veggies

Store in meal prep containers or in the bags they come with in the crisper drawer. If a vegetable has a high-water content and tends to go limp quick, wrap it with a paper towel before storing it in the fridge. The paper towel absorbs excess liquid that will prevent it from wilting or turning mushy.

Meat and Seafood

As a general guideline, try to use seafood within 2 days of purchase. For this reason, I always place recipes with seafood earlier in the Meal Plan Menu. Meat can typically last 4-5 days. If you won’t be using meat and seafood, best to freeze them right away. Vacuum seal before freezing to prevent freezer burn.

Properly frozen foods are good for up to 6 months before their flavor and texture start to lessen.

If you do not have a vacuum sealer, wrap fish and meat tightly with saran wrap, then wrap tightly with aluminum foil. Store in a Ziploc bag, squeezing as much air out as possible. Date them and pop them in the freezer for later use.

When thawing vacuum sealed food, especially fish, puncture a hole or cut a slit in the bag to prevent the risk of botulism. Botulism thrives in low oxygen environment, which is what vacuum sealing does. (Note: when botulism grows, the smell and texture of the fish will not change, but the toxins it produces can be deadly.)

Use different cutting boards for your proteins and veggies. Always wash and disinfect knives when switching from meat to veggies to prevent cross-contamination. It goes without saying that you should clean your produce before consumption and preparation.

During prep, always start with food cooked at the lowest temperature first, working your way up. For example, chopped scallions are often used as garnish and will be consumed raw, so chop them before potatoes (which you will cook so the risk is lower). Likewise, you would prepare salad greens first.  

The same principle applies when keeping them in the fridge. Don’t stack raw chicken above fish – any juices from the chicken that trickle into the fish would pose a risk. Should the chicken be contaminated with salmonella, the time and temperature at which you would cook fish to perfection is not enough to kill the bacteria.  
Meal 1

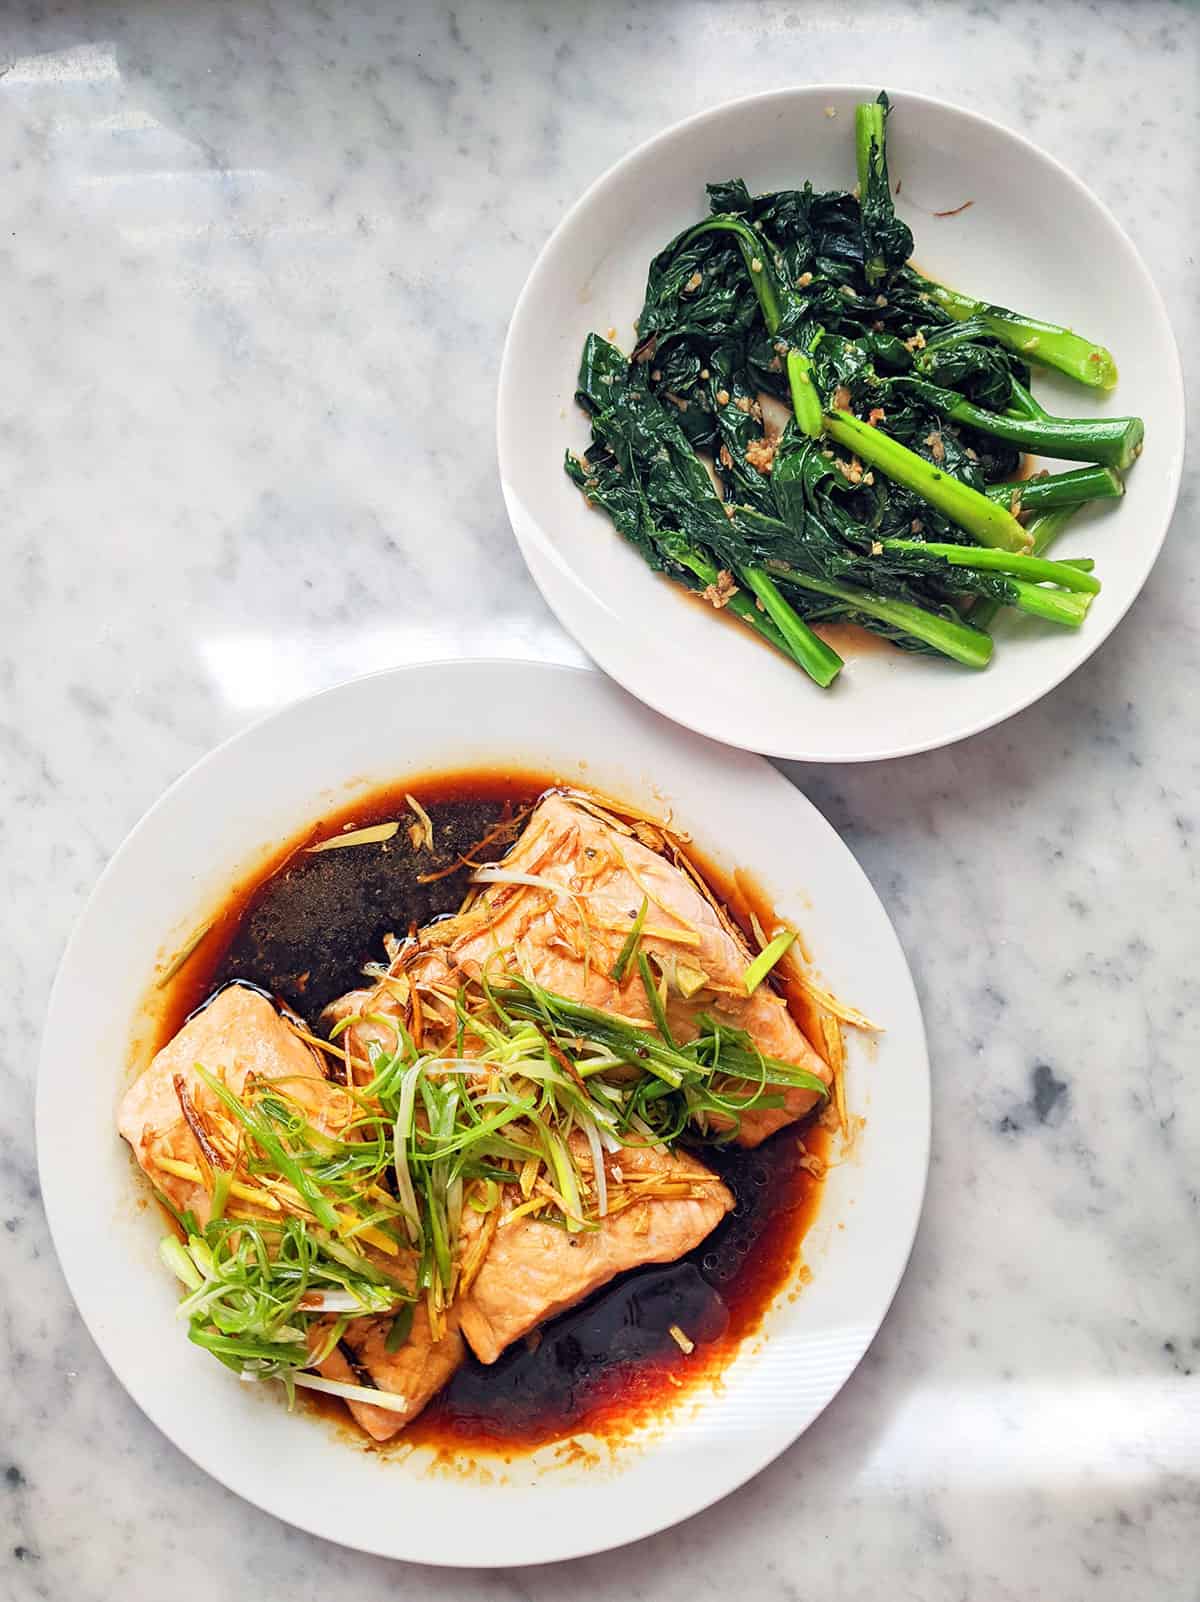
See the full recipe post with tips, tricks, and substitutions here: Steamed Salmon with Sweet Soy Sauce

Recipe for the Garlic and Ginger Gai Lan is right after the salmon recipe!

Print Recipe
No ratings yet

Steamed Salmon with Sweet Soy Sauce*

Salmon made in the style of Cantonese steamed fish that's often served at Chinese banquets. With just a few simple Chinese pantry ingredients, you can easily recreate this at home for a fraction of the price!
Prep Time15 minutes
Cook Time8 minutes
Total Time23 minutes
Course: Main Course, Side Dish
Cuisine: Asian, Chinese
Keyword: 20-minute meals, cantonese steamed fish, cantonese-style steamed fish, chinese steamed fish
Servings: 4
Calories: 294kcal

Equipment

  • Steamer rack or a make-shift trivet see notes

Ingredients

  • 1 lb skin-on descaled salmon filet
  • 4 inches ginger halved, peeled, and julienned into thin strips
  • 2 stalks scallion cut into 2-inch length and julienned into thin strips
  • A handful of cilantro leaves optional
  • 2 Tbsp cooking oil
  • 2 Tbsp Shaoxing wine

Sauce:

  • 2 Tbsp rock sugar about 25 g (highly recommended) or to taste*
  • 4 Tbsp soy sauce
  • 2 Tbsp Shaoxing wine
  • 3 Tbsp water
  • 1/4 tsp sesame oil
  • A few dashes of ground white pepper

Instructions

  • Mix the sauce together in a bowl and set aside. Heat up a wok with at least 1 inch of water, making sure it doesn’t touch the bottom of your plate when steaming. Meanwhile, pat the salmon dry and lay onto a plate skin side down (make sure the plate fits the wok). Pour 2 Tbsp Shaoxing wine over the fish. Top fish with half of the ginger strips.
  • As soon as the water boils, place a trivet* into the wok to prop the plate up such that the water isn’t touching the plate. Lower heat to medium low. Cover the wok and steam for 8 minutes or until cooked through.
  • Remove the plate of fish from the wok immediately and discard the fish water and ginger strips. Place a fresh layer of ginger and scallion strips onto the fish.
  • Rinse and dry your wok. Heat wok back up over high heat with 2 Tbsp of oil, swirling until it’s hot and shiny. Pour the hot oil over the fish, ginger, and scallion. Put wok back on the stove and heat up the Sweet Soy Sauce mixture over medium heat until bubbly and rock sugar has dissolved. Pour the soy sauce over the fish and top with cilantro if using. Serve hot.

Notes

  • You can cut the salmon into 2-3 pieces to fit onto your plate if it’s too long.
  • You can make a make-shift trivet by rolling up aluminum foil into a thick log. Shape it into a circle and place it in the center of your wok to prop up your plate.
  • I highly recommend using rock sugar instead of granulated sugar. It gives the sauce a different sheen and viscosity. If substituting with granulated sugar, reduce the amount to 1 & 1/3 Tbsp first and adjust to taste.
  • If rock sugar crystals are very large (about 2+ inches large crystals), pound/whack them into smaller crystals. If using smaller crystals, simply allow them to dissolve in step 4. You might have to add 1-2 Tbsp more water if too much liquid has boiled off while waiting.

Nutrition

Calories: 294kcal
Print Recipe
No ratings yet

Garlic and Ginger Gai Lan*

A super simple and easy everyday stir-fry using gai lan!
Prep Time2 minutes
Cook Time5 minutes
Total Time7 minutes
Course: Side Dish, Stir-Fry
Cuisine: Asian, Chinese
Keyword: 10-minute recipes, gailan, stir-fried gai lan
Servings: 4
Calories: 68kcal

Ingredients

  • 1 lb gai lan end of stalks trimmed and blanched for 2 minutes
  • 3 cloves garlic minced
  • 1 knob ginger grated
  • 1/4 cup stir-fry sauce

Instructions

  • Heat vegetable oil in a wok over medium low heat. Sauté garlic and ginger for 1-2 minutes. Once the garlic and ginger is just about to brown, add the Stir Fry Sauce and turn the heat up to medium.
  • Add in the blanched gai lan and toss to coat until heated through (1-2 minutes) over medium heat. Dish out and serve.

Notes

You can cut the gai lan into 2 inch widths for more bite sized pieces.

Nutrition

Serving: 132g | Calories: 68kcal

Meal 2

A plate of sliced pork belly char siu over rice and a side of gai lan

See the full recipe post with tips, tricks, and substitutions here: Air Fryer Pork Belly Char Siu. Don’t forget to prep your gai lan while you air fry your char siu!

A plate of sliced pork belly char siu over rice and a side of gai lan
Print Recipe
No ratings yet

Air Fryer Pork Belly Char Siu*

Delicious sweet and sticky charsiu but with the tenderness of pork belly. What’s not to like?
Course: Main Course
Cuisine: Chinese
Servings: 4
Calories: 550kcal

Equipment

  • Air fryer

Ingredients

  • lb skinless pork belly cut into 2 long strips
  • 4 cloves garlic minced

Char siu sauce

  • 2 pieces Chinese fermented red bean curd substitute 1 Tbsp Hoisin sauce if unavailable
  • 1 Tbsp maltose or honey
  • 1 Tbsp Shaoxing wine or Chinese rose wine
  • 1 Tbsp soy sauce
  • 1 Tbsp oyster sauce
  • 1 tsp dark soy sauce
  • ¼ tsp ground white pepper
  • 100 g sugar

Instructions

  • In a bowl, mix the char siu sauce ingredients until well incorporated. Stab the pork belly all over with a fork to allow the marinade to further penetrate the pork. Marinate the pork belly with the garlic and char siu in a Ziploc bag in the fridge overnight (at least 8 hours).
  • Preheat air fryer 375°F. Line the tray with a small sheet of foil just enough for the pork belly to rest on. Do not cover all the air flow vents if you can help it. Add the pork belly when the air fryer is ready. Roast for 15 minutes. Baste with leftover char siu marinade 1-2 times in between.
  • When the timer is up, flip the pork belly and baste the other side. Roast for another 10 minutes. Check on your pork belly in between to make sure it isn’t burning.
  • Test to check that pork belly is cooked through and tender. If the pork belly is not charred enough, switch the air fryer to 400°F to “broil” for 1 min until the pork belly is nicely charred. Let it cool/rest for 10 minutes. Slice into small pieces and serve over rice with Garlic and Ginger Gai Lan.

A note on leftover marinade for sauce

  • If you wish to use the remaining marinade over your rice, you MUST simmer it for at least 3-4 minutes before it's safe to eat.

Notes

  • If using a conventional oven, set temperature to 400°F and increase cooking time in step 3 to 15-20 minutes.
  • Air fryer and oven temperature varies between models. Please use discretion to gauge cook times. If unsure, check on your pork belly every now and then to make sure it’s cooking as expected.
  • If you wish to use the remaining marinade sauce to top the finished product, you MUST cook it on a simmer for a few minutes so that it’s safe to eat. You can also drizzle it on the rice.

Nutrition

Calories: 550kcal

If you enjoyed this meal plan, please share it on Instagram, Facebook, TikTok or your favorite social media platform!

Shopping List

checkingredientquantityunitcategorynoteslist type
dark soy sauce1tspcondiments and spicespantry
ground white pepper0.25tspcondiments and spicesaka white pepper powderpantry
maltose or honey1Tbspcondiments and spicespantry
oyster sauce1Tbspcondiments and spicespantry
rock sugar2Tbspcondiments and spicespantry
sesame oil0.25tspcondiments and spicespantry
shaoxing wine0.25cupcondiments and spicespantry
soy sauce0.3125cupcondiments and spicespantry
sugar100gcondiments and spicespantry
stir-fry sauce0.5cuphomemade (click to see recipe)pantry
chinese fermented red bean curd2piececanned or jarredshopping
shaoxing wine or chinese rose wine1Tbspliquor/winesshopping
skin-on (descaled) salmon filet1lbmeat and seafoodshopping
skinless pork belly1.5lbmeat and seafoodshopping
gai lan2lbproduceshopping
garlic10cloveproduceabout 1 headshopping
ginger4inchproduceshopping
ginger2knobproduceshopping
scallion2stalkproduceshopping

Other 2-day Meal Plans

Hi, I’m Ariel 

I’m a foodie with a simple philosophy: why should amazing food be reserved for the weekends alone? I’m all about making every meal delicious because, let’s face it, we only have so many meals in our lifetime.

My mission? To take the stress out of cooking with easy-to-use meal plans so you can enjoy mouthwatering recipes any day of week. Join me on this tasty journey and let’s savor “more taste, less waste” in every bite!

Leave a Comment

Your email address will not be published. Required Fields are marked *

Hi, I’m Ariel 

I’m a foodie with a simple philosophy: why should amazing food be reserved for the weekends alone? I’m all about making every meal delicious because, let’s face it, we only have so many meals in our lifetime.

My mission? To take the stress out of cooking with easy-to-use meal plans so you can enjoy mouthwatering recipes any day of week. Join me on this tasty journey and let’s savor “more taste, less waste” in every bite!