5 “one-wok” dinners for easy, fuss-free dinners – perfect for anyone on a time crunch!
Similar to the Quick and Easy Lunch plan, the recipes in this collection aim for simplicity. They’re designed to be a swift affair, requiring just 30 minutes from start to finish, even if you haven’t prepped the ingredients in advance!
If you anticipate a time crunch as the dinner hour approaches, consider prepping ahead or skipping the marinating time (they’ll still taste good). This way, you can have them on the table in just 15 minutes!
Make your rice in a large batch
I highly recommend preparing rice for the entire week in a large batch or doubling each batch as you cook. If you’re making rice today, go ahead and prepare some for tomorrow as well. There’s nothing more frustrating than having your main course ready in 15 minutes, only to find your rice still cooking.
Delicious rice takes 30 minutes to cook, even in the Instant Pot. (Emphasis on “delicious” – I include the 15-minute rule of letting the rice sit after it’s “cooked” to become fluffy.) See the issue here?
Meal 3 also calls for cooked rice that’s sat out in the fridge for at least a day or two, so having leftover rice ready is handy. If you have strong opinions about having freshly cooked rice, start it before you begin prepping/cooking.
How to store and reheat rice
Transfer the freshly cooked rice to an airtight or microwave-safe container. Allow it to cool for 20-30 minutes with the lid off, and then cover it tightly. If you plan to use it within the next two days, store it in the fridge. Otherwise, place it in the freezer to prevent it from drying out.
To reheat, spritz some water on the rice and then microwave it with the lid slightly ajar to allow steam to vent. A spray bottle can be handy for this step, but you can also wet your hands and flick water over the rice.
Pro tip: Over microwaving rice on the highest power setting makes rice hard. Use shorter intervals and mix rice in between for more even heating. For a 1100W microwave, frozen rice takes about 5 minutes and rice from the fridge takes around 1-2 minutes.
What is “Chinese eggplant”?
In the shopping list below, you’ll see an ingredient called “Chinese eggplant”. This eggplant is a slightly lighter purple, long, and thin. It’s the same one you grew up eating if you’ve had plenty of East Asian cuisines. And the same one you see in Asian supermarkets.
Japanese eggplants are slightly smaller in size, but they are interchangeable for this meal. Western/American eggplants work in a pinch, but you’ll need to peel them they have tougher skin.
Good luck and may your week be a little less stressful and a little more delicious with this plan!
First time here?
Check out my Getting Started guide to learn how to use this meal plan.
2 stalk scallion thinly sliced with white and green parts separated
4 oz cremini mushroom sliced
4 clove garlic minced
0.75 lb zucchini sliced about 1/2-inch thick and then halved (half-moon shaped)
1 lb boneless and skinless chicken thigh cut into bite-sized pieces (about 1-inch in size)
Blanching vegetables serves 2 purposes: (1) It prevents loss of flavor, color, and texture—extending the “life” of the vegetable throughout the week, and (2) it gives us a head start in the cooking process for stir-fries. Stir-frying generally only takes 5 minutes. If you start from raw, some pieces won’t cook as evenly as others (especially hardy vegetables like broccoli). Blanching pre-cooks each piece of veggie so you will have a consistent tasting stir-fry every time. This is a well-known technique used in many Chinese restaurants!
Here’s how:
Bring a large pot of water to a rolling boil (about 6 cups) and add 1 Tbsp kosher salt. Prepare an ice bath in a large bowl on the side.
Blanch vegetables for the time indicated on the recipe/prep summary. The countdown starts when the water comes back to a boil, so don’t overcrowd! Once done, immediately transfer the vegetables with a sieve to the ice bath for a few minutes to stop the cooking process.
When vegetables have cooled, drain well and transfer to a storage container or Ziploc bag. Use a salad spinner to remove excess water for leafy greens or use clean hands to squeeze out remaining water.
You can repeat this process with all the vegetables using the same pot of water. Bring water back to a rolling boil before starting a new batch. Replenish ice to ice bath as needed to keep water cold.
Chopped Aromatics
Store in an air-tight container in the fridge to keep maximum freshness. Use them within 7-10 days. If you suspect it has gone bad – the color has changed (e.g. turns brown), there is visible mold, the texture is mushy – toss them. Always err on the side of caution to avoid food poisoning.
Chopped Veggies
Store in meal prep containers or in the bags they come with in the crisper drawer. If a vegetable has a high-water content and tends to go limp quick, wrap it with a paper towel before storing it in the fridge. The paper towel absorbs excess liquid that will prevent it from wilting or turning mushy.
Meat and Seafood
As a general guideline, try to use seafoodwithin 2 days of purchase. For this reason, I always place recipes with seafood earlier in the Meal Plan Menu. Meat can typically last 4-5 days. If you won’t be using meat and seafood, best to freeze them right away. Vacuum seal before freezing to prevent freezer burn.
Properly frozen foods are good for up to 6 months before their flavor and texture start to lessen.
If you do not have a vacuum sealer, wrap fish and meat tightly with saran wrap, then wrap tightly with aluminum foil. Store in a Ziploc bag, squeezing as much air out as possible. Date them and pop them in the freezer for later use.
When thawing vacuum sealed food, especially fish, puncture a hole or cut a slit in the bag to prevent the risk of botulism. Botulism thrives in low oxygen environment, which is what vacuum sealing does. (Note: when botulism grows, the smell and texture of the fish will not change, but the toxins it produces can be deadly.)
Use different cutting boards for your proteins and veggies. Always wash and disinfect knives when switching from meat to veggies to prevent cross-contamination. It goes without saying that you should clean your produce before consumption and preparation.
During prep, always start with food cooked at the lowest temperature first, working your way up. For example, chopped scallions are often used as garnish and will be consumed raw, so chop them before potatoes (which you will cook so the risk is lower). Likewise, you would prepare salad greens first.
The same principle applies when keeping them in the fridge. Don’t stack raw chicken above fish – any juices from the chicken that trickle into the fish would pose a risk. Should the chicken be contaminated with salmonella, the time and temperature at which you would cook fish to perfection is not enough to kill the bacteria.
2tspred pepper flakesor adjust to your preferred heat level
2Tbspchili oilpreferably lao gan ma, adjust to your preferred heat level
1Tbspla doubanjiangspicy bean paste
1Tbspsoy sauce
1tspsesame oil
Instructions
Drain the water from the tofu and cut into bite-sized cubes. Set aside. Combine sauce ingredients together in a small bowl.
Heat up a wok on medium high heat with 1 Tbsp oil. Add in the garlic and stir-fry for 10-20 seconds. Add the ground pork and let it sear on one side for 1 minute. Add the sauce to the pork and stir-fry until no longer pink.
Add in 1/2 cup water and mix with the pork. Let the water come to a boil, push the pork to the sides of the wok, and add the tofu to the liquid. Spoon some of the sauce onto the tofu and make sure the tofu is submerged in the sauce. (Don’t stir too much, the tofu breaks easily.) Turn the heat down to medium low and let it simmer for 3-5 minutes until the sauce has reduced and begins to thicken.
Add in the cornstarch slurry if the sauce is still too watery and let it cook for 1 minute to thicken. Do a taste test and add kosher salt to taste as needed. Add half the scallions. Gently stir and blend well. Dish out and garnish with the other half of the scallions. Serve hot.
Meal 2
How to store basil for weeks
Fill a tall jar or container with approximately 1 inch of water. Insert the basil stems into the water, positioning them cut-side down (with the leaves on top). Cover basil loosely with a plastic bag – the ones from the grocery stores work fine. Store in the fridge and it will keep for up to 2 weeks!
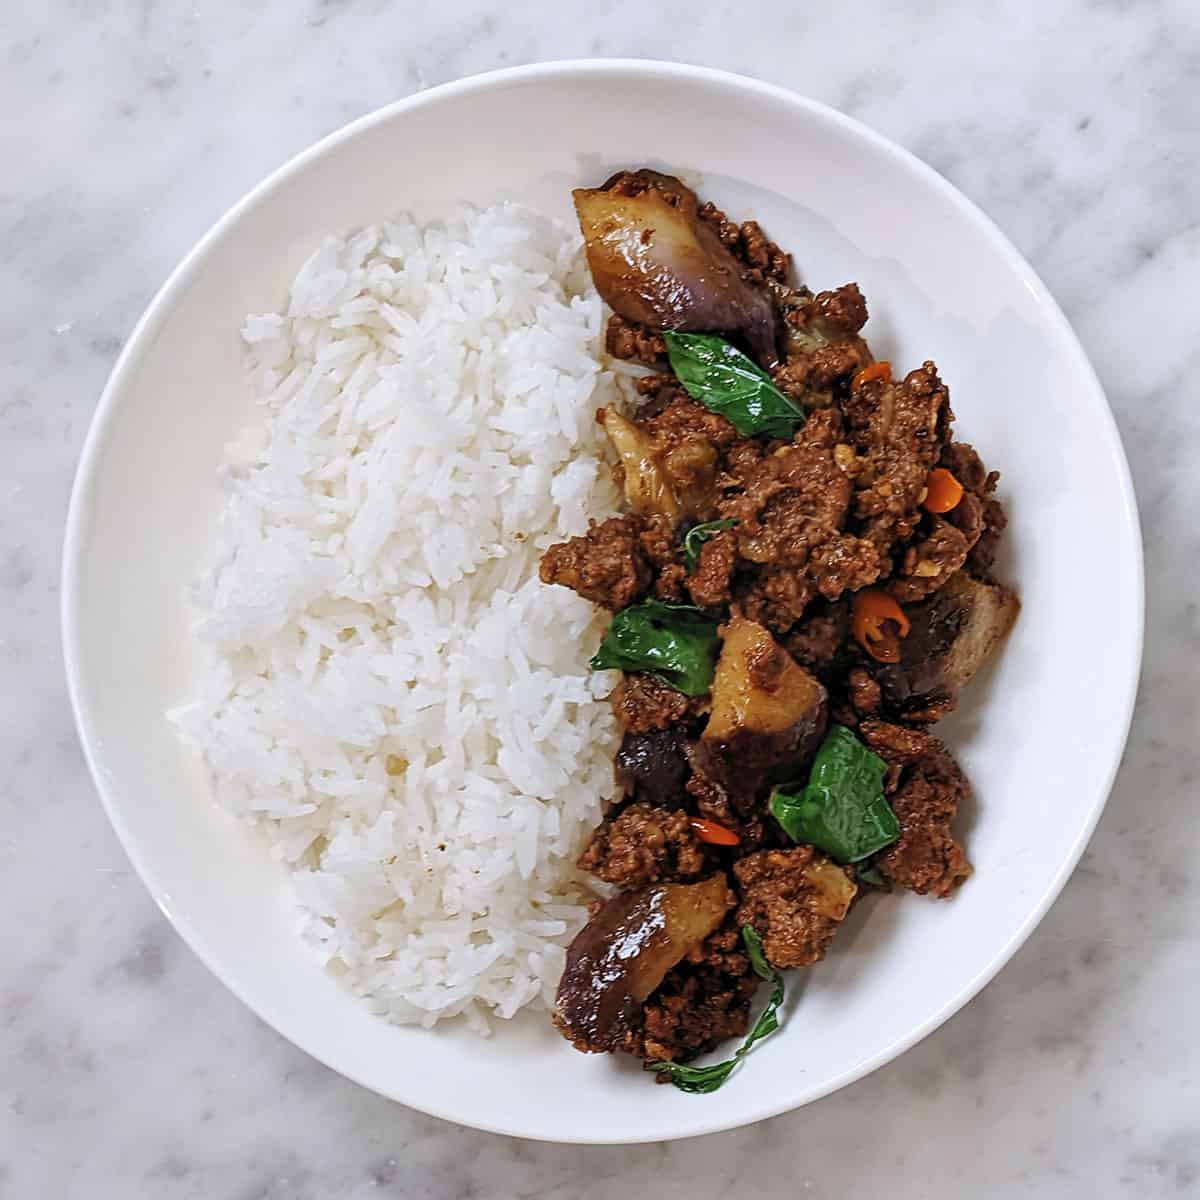
This recipe was adapted from Marion Grasby's cookbook "Always Delicious". And delicious it is! You wouldn't believe such a short list of ingredients would create such a winning combo.
Add the minced garlic and cook for 30 seconds until fragrant. Add in the ground beef. Break it apart and spread it in the wok for even cooking. Let it sear for 2 minutes, then stir-fry until it’s 80% cooked.
Add in the eggplant and chili (if using) and stir-fry for a minute until well incorporated.
Pour in the sauce and combine well. Cover the wok with a lid and let the eggplant steam on medium heat for 5-10 minutes until tender. Add more water, 1 Tbsp at a time, if it becomes too dry. Check the doneness of the eggplant by poking the thickest part with a chopstick; it should be soft and easily pierced.
Remove the lid and add the basil leaves. Quickly toss until the basil has wilted.
Serve hot with steamed rice.
Notes
You can substitute chili oil or red pepper flakes for Thai chilis if preferred.To store leftover basil leaves, wash and pat dry. Lay them flat in a Ziploc bag without overlapping (use multiple bags if necessary) and freeze them flat in the freezer. Once frozen, you can transfer them into the same bag if desired. Label the bag to be used within 6 months for the best flavor and quality. Properly frozen basil can be kept almost indefinitely.
Meal 3
Pro tip: Don’t overcrowd your wok/pan. If your leftover rice is fridge cold, microwave it slightly so it’s room temperature. This will prevent your wok from cooling down too fast, which is what causes sticking! You also don’t need to spritz water before microwaving for this one!
0.75lbboneless and skinless chicken thighcut into bite-sized pieces (about 1-inch in size)
4ozcremini mushroomsthinly sliced
4clovesgarlicminced
1largeshallotdiced
3stalks Thai basilleaves only
3cupscooked long-grain ricebest if left overnight in the fridge (make sure to break down any clumps)
2smallThai chilissliced (optional)
Salt and pepper to taste
Sauce:
1Tbspsoy sauce
1Tbspfish sauce
3tspsugarideally palm sugar
1tspchicken bouillon powder
1/4tspground white pepper
To serve:
4largeeggsoptional, fried
Instructions
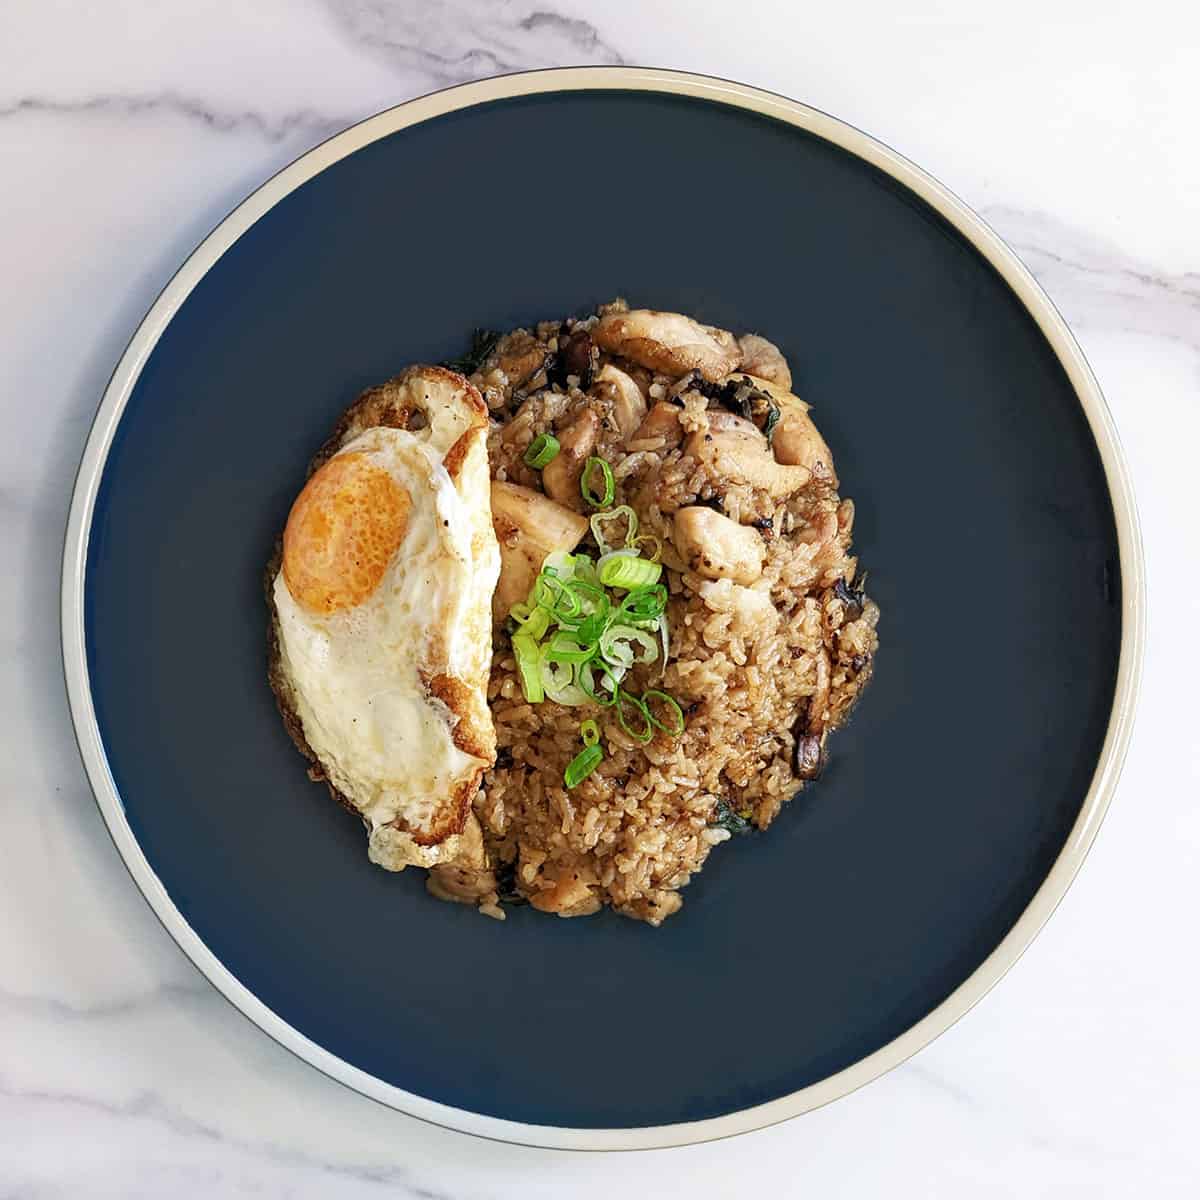
Heat a wok with 1 Tbsp of oil over high heat. Season the chicken with salt and pepper, then add it to the wok. Allow one side to sear until browned (about 1-2 minutes), then stir-fry until the meat is fully cooked. Transfer it to a plate and set aside.
If the wok loses its luster, add an additional 1/2 Tbsp of oil and swirl to coat. Add the diced shallots with a small pinch of salt. Cook until the shallots are soft, translucent, and slightly browned on the edges. Push the shallots to one side of the wok and add the mushrooms. Cook for 1-2 minutes until they turn golden.
Add 1 more Tbsp of oil around the edge of the wok, then add in the garlic and sliced chili (if using). Toss for 30 seconds until fragrant. Add the rice and stir-fry until it’s thoroughly mixed with the other ingredients. Ensure each grain is coated with oil. Maintain very high heat to prevent sticking; you may need to add a bit more oil if sticking occurs.*
Drizzle in the sauce and stir-fry for 1 minute. Add the chicken back in. Stir-fry until the sauce is evenly distributed. Reduce the heat and taste test, adjusting with more salt if necessary. Finally, add the Thai basil leaves and cook until they slightly wilt (about 30 seconds). Serve with fried eggs if desired.
Notes
To prevent sticking, ensure that your wok is well-greased and kept at very high heat throughout the cooking process. Avoid overcrowding the wok, as this significantly lowers its surface temperature. Keep a plate nearby to transfer ingredients as you proceed with the recipe.Speed is essential during the entire cooking process to avoid burning, so have all your ingredients ready and within reach before starting the stir-frying steps.
Meal 4
Pro tip: If you have tomato paste on hand, adding it with the ketchup makes the tomato flavor even more pronounced.
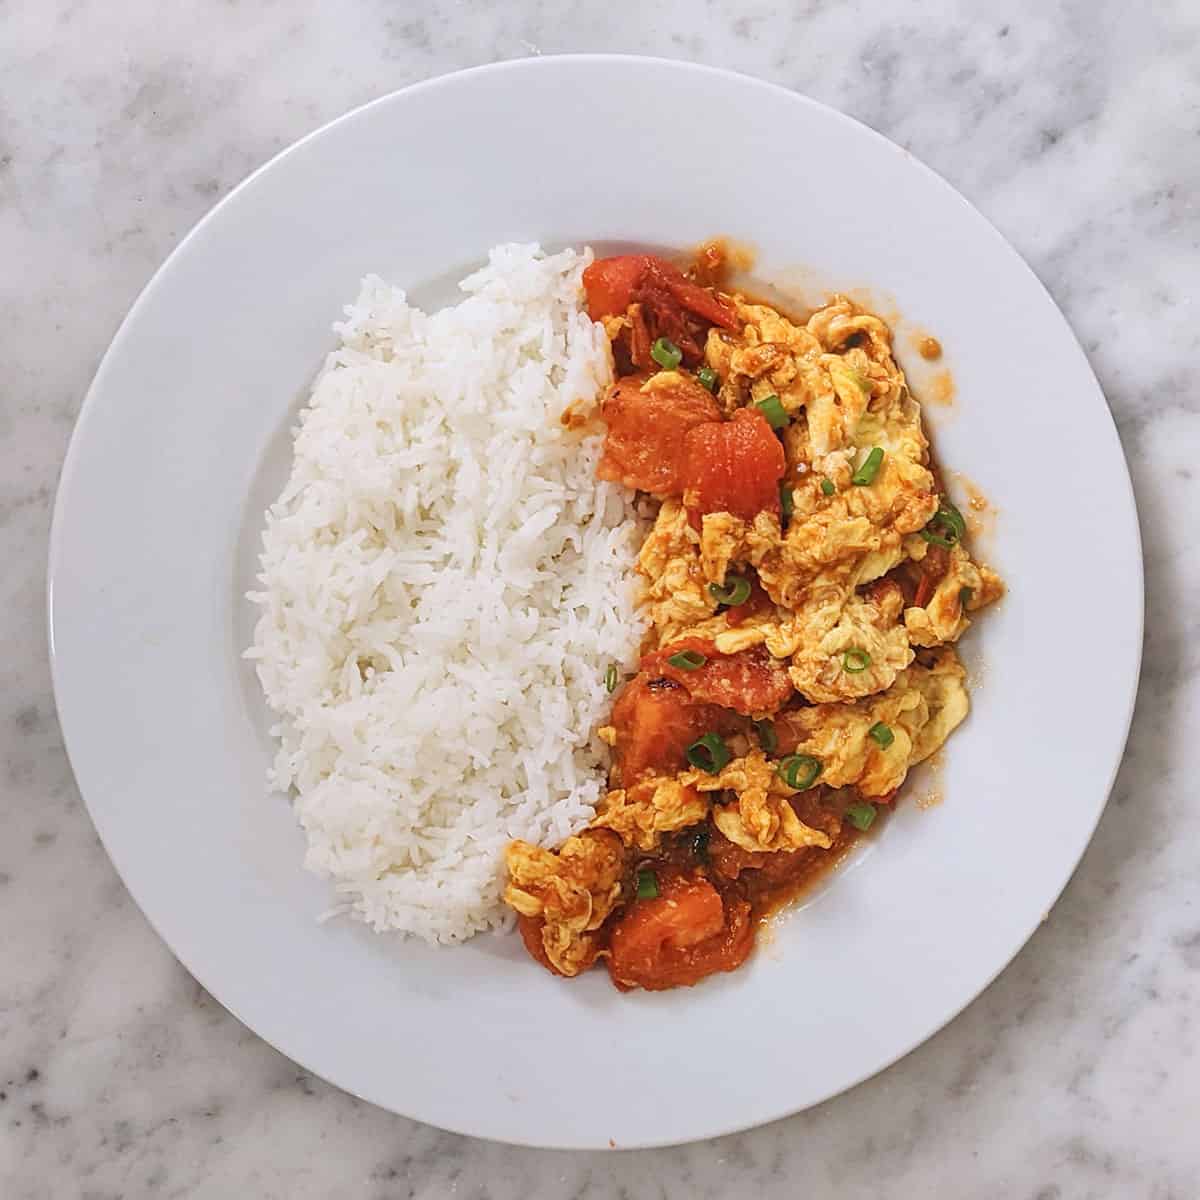
The classic Chinese tomato egg with soft and silkly scrambled eggs. This recipe reveals the secret to getting that juicy tomato-y sauce without mushy tomatoes! Simple, nostalgic, and comfort all-in-one.
Prep Time5 minutesmins
Cook Time5 minutesmins
Total Time10 minutesmins
Course: Main Course
Cuisine: Asian, Chinese
Keyword: 15-minute meals, Chinese tomato eggs, easy meals, quick lunch
Servings: 4
Ingredients
Ingredients:
8mediumRoma tomatoescut into large chunks* (see tip)
8largeeggsscrambled with 2 tsp fish salt OR a healthy pinch of salt
2stalks scallionthinly sliced with white and green parts separated
4clovesgarlicchopped or minced
1tspsesame oil
white or black pepper to taste
oil
Sauce:
4Tbspketchup
2Tbspwater
1TbspShaoxing wine
2tspoyster sauce
1Tbspsugaror to taste
Instructions
Prepare the sauce by whisking together the ketchup, water, Shaoxing wine, oyster sauce, and sugar (if using) in a small bowl. Set aside.
Scramble the eggs with fish sauce or salt in a separate bowl and set aside.
Heat a wok over medium-high heat until smoking. Add 2 tablespoons of oil and swirl to coat the wok. Add the scrambled eggs and quickly scramble until they are almost set but still a bit runny. Remove the eggs from the wok and transfer to a plate.
Add 1/2 tablespoon of oil to the wok, followed by the garlic. Stir-fry for 30 seconds until fragrant. Add half the tomatoes and the white parts of the scallion. Stir-fry for 1 minute.
Add the sauce to the wok and toss to combine with the tomatoes and scallions. Simmer for 1-3 minutes until tomatoes begin to break down and release some of its juices.
Add the scrambled eggs and the remaining half of tomatoes to the wok and gently mix everything together.* Cover and simmer for another minute until the tomatoes have softened to your desired texture. Keep it to 1 minute or less if you prefer the tomato to have a firmer texture. Too long and it can turn to mush!
Remove the lid, add 1 teaspoon of sesame oil and stir-fry until the sauce has thickened. Serve over steamed rice and garnish with the green part of the scallion.
Notes
Cut tomato in half crosswise, then cut into quarters. Do the same for the other half. If you prefer your eggs on the runnier side, allow the tomatoes to soften to your liking before adding the eggs at the end.If making for only 2 servings, I recommend halving the recipe. This meal does not taste as good reheated.If you prefer a thicker sauce, you can add 1 teaspoon of cornstarch mixed with 1 tablespoon of water to the sauce when you add it to the wok.Eggs have plenty of protein, but if I crave a little meat, I sometimes eat this with a slice of pan fried spam.
1lbboneless and skinless chicken thighcut into bite-sized pieces (about 1-inch in size)
0.75lbzucchinisliced about 1/2-inch thick and then halved (half-moon shaped)
4ozcremini mushroomssliced
4clovesgarlicminced
Black pepperto taste
Cornstarch slurry2 tsp cornstarch + 1 Tbsp water, optional or as needed
Oil as needed
Marinade:
2tspcornstarch
1Tbspsoy sauce
1tspdark soy sauce
2Tbsprice wine
1tspsesame oil
1/2tspsugaror to taste
1/8tspsea salt
Sauce:
1/4cuprice wine
1/4cupwater
2Tbspoyster sauce
Instructions
Mix the marinade ingredients together and marinate the chicken pieces for 15-20 minutes. In the meantime, mix the sauce ingredients together and prepare the cornstarch slurry. Set aside.
Heat a wok over medium-high heat and add 1 Tbsp of oil. Ensure the wok and oil are very hot (the oil should shimmer), then add the chicken pieces. Spread them out in an even layer to sear on one side for about 1-2 minutes. Use a spatula to release the chicken pieces if they stick and stir-fry for another 2 minutes until the meat is just cooked and no longer pink. Transfer to a plate and set aside.
Add a little more oil to the wok. Add the minced garlic and stir-fry for 30 seconds until aromatic. Add in the mushroom slices and toss to coat with the oil. Let the mushrooms sear and caramelize for about a minute. Then add in the zucchini and stir-fry for another minute.
Finally, add the chicken back in with the sauce and mix everything together to combine. Allow the chicken to fully cook through. Test the doneness by poking the chicken and zucchini with a fork (see notes). If needed, mix in the cornstarch slurry and let the sauce return to a boil/bubble for 30 seconds to thicken the sauce if it’s too watery.
Notes
The consistency of the sauce depends on how hot your wok gets during the stir-frying phase. If your wok is hot enough to let enough of the sauce’s liquid evaporate, you might not need the cornstarch slurry.To check if the chicken is cooked through, the juices should run clear. For the zucchini, it should turn glossy bright green on all sides and be soft with a slight crunch or bite to it. Adjust the cooking time to your preference.
If you enjoyed this meal plan, please share it on Instagram, Facebook, TikTok or your favorite social media platform!
I’m a foodie with a simple philosophy: why should amazing food be reserved for the weekends alone? I’m all about making every meal delicious because, let’s face it, we only have so many meals in our lifetime.
My mission? To take the stress out of cooking with easy-to-use meal plans so you can enjoy mouthwatering recipes any day of week. Join me on this tasty journey and let’s savor “more taste, less waste” in every bite!
I made this meal for two people and it is as it says. QUICK and DELICIOUS. Portion was just right and i was able to cook everyday even with my busy schedule. Thank you!!!
I’m a foodie with a simple philosophy: why should amazing food be reserved for the weekends alone? I’m all about making every meal delicious because, let’s face it, we only have so many meals in our lifetime.
My mission? To take the stress out of cooking with easy-to-use meal plans so you can enjoy mouthwatering recipes any day of week. Join me on this tasty journey and let’s savor “more taste, less waste” in every bite!




Joy
Love this meal plan! Will be cooking it again this week since I have lots of fresh Thai basil. Would love to see more new meal plans.
2 years ago