3-day Meal Plan 2

Serves 2 | Difficulty: Medium

Share this

cover photo of 3 meals featuring Japanese Beef Curry

Here’s how to creatively repurpose your leftover Japanese curry into delicious meals that can shine on their own!

Japanese curry is my ultimate go-to comfort meal—it’s like a heartier beef stew with a flavorful kick! If you love making it regularly but want new ways to keep it exciting, this meal plan is for you.

Start the week with a big batch of Japanese curry, then enjoy it throughout the week with two of my favorite twists: Tonkatsu Curry and Curry Omurice!

These recipes not only help clear out your fridge but also turn your curry into something new and delicious every time. I love the convenience of leftovers, but I also get bored of them easily. That’s why this meal plan is perfect for me.

In fact, pairing tonkatsu with curry is even more exciting than Japanese curry alone. You get the best of both worlds: crispy, crunchy pork chops drizzled with savory, silky curry sauce with beef. And having two kinds of meat in one dish? Luxurious.

This isn’t just a mish-mash of leftovers thrown together—it’s a carefully planned building block for each day’s meal.

For detailed tips on cooking, shopping, and substitutions, I’ve provided write-ups for each recipe in their respective posts. You can find the links in the “meal” section below for your convenience.

I hope you enjoy these curry-inspired meals as much as I did!

First time here?

Check out my Getting Started guide to learn how to use this meal plan.

Prep Summary

  • 1.25 lb carrot cut into even bite-sized pieces
  • 4 oz cremini mushroom sliced
  • 7 clove garlic, minced
  • 0.25 medium, onion diced (for the omurice)
  • 3 medium onion thinly sliced (for the curry)
  • 1 piece 1/2-inch pork chop or chicken (about 4-6 oz) cut into 1-inch cubes or thin strips (for omurice)
  • 2 piece 1/2-inch pork chop, seasoned with salt overnight for best results
  • 2 lb well-marbled beef chuck steak, excess fat trimmed
  • 5 cube japanese curry roux chopped or grated with a coarse grater
  • 2 tsp chopped parsley (optional)

  • 1.25 lb carrot cut into even bite-sized pieces
  • 4 oz cremini mushroom sliced
  • 4 clove garlic minced
  • 3 medium onion thinly sliced
  • 2 lb well-marbled beef chuck steak excess fat trimmed
  • 4 cube japanese curry roux chopped or grated with a coarse grater
  • 1.5 cup panko breadcrumbs, toasted ahead of time (optional)
  • 2 piece 1/2-inch pork chop, seasoned with salt overnight for best results (optional)
  • 3 clove garlic minced
  • 0.25 medium onion diced
  • 1 cube japanese curry roux chopped or grated with a coarse grater
  • 1 piece 1/2-inch pork chop or chicken (about 4-6 oz) cut into 1-inch cubes or thin strips
  • 2 tsp chopped parsley (optional)

Blanching vegetables serves 2 purposes: (1) It prevents loss of flavor, color, and texture—extending the “life” of the vegetable throughout the week, and (2) it gives us a head start in the cooking process for stir-fries. Stir-frying generally only takes 5 minutes. If you start from raw, some pieces won’t cook as evenly as others (especially hardy vegetables like broccoli). Blanching pre-cooks each piece of veggie so you will have a consistent tasting stir-fry every time. This is a well-known technique used in many Chinese restaurants!

Here’s how:

  1. Bring a large pot of water to a rolling boil (about 6 cups) and add 1 Tbsp kosher salt. Prepare an ice bath in a large bowl on the side.
  2. Blanch vegetables for the time indicated on the recipe/prep summary. The countdown starts when the water comes back to a boil, so don’t overcrowd! Once done, immediately transfer the vegetables with a sieve to the ice bath for a few minutes to stop the cooking process.
  3. When vegetables have cooled, drain well and transfer to a storage container or Ziploc bag. Use a salad spinner to remove excess water for leafy greens or use clean hands to squeeze out remaining water.
  4. You can repeat this process with all the vegetables using the same pot of water. Bring water back to a rolling boil before starting a new batch. Replenish ice to ice bath as needed to keep water cold.

Chopped Aromatics

Store in an air-tight container in the fridge to keep maximum freshness. Use them within 7-10 days. If you suspect it has gone bad – the color has changed (e.g. turns brown), there is visible mold, the texture is mushy – toss them. Always err on the side of caution to avoid food poisoning.

Chopped Veggies

Store in meal prep containers or in the bags they come with in the crisper drawer. If a vegetable has a high-water content and tends to go limp quick, wrap it with a paper towel before storing it in the fridge. The paper towel absorbs excess liquid that will prevent it from wilting or turning mushy.

Meat and Seafood

As a general guideline, try to use seafood within 2 days of purchase. For this reason, I always place recipes with seafood earlier in the Meal Plan Menu. Meat can typically last 4-5 days. If you won’t be using meat and seafood, best to freeze them right away. Vacuum seal before freezing to prevent freezer burn.

Properly frozen foods are good for up to 6 months before their flavor and texture start to lessen.

If you do not have a vacuum sealer, wrap fish and meat tightly with saran wrap, then wrap tightly with aluminum foil. Store in a Ziploc bag, squeezing as much air out as possible. Date them and pop them in the freezer for later use.

When thawing vacuum sealed food, especially fish, puncture a hole or cut a slit in the bag to prevent the risk of botulism. Botulism thrives in low oxygen environment, which is what vacuum sealing does. (Note: when botulism grows, the smell and texture of the fish will not change, but the toxins it produces can be deadly.)

Use different cutting boards for your proteins and veggies. Always wash and disinfect knives when switching from meat to veggies to prevent cross-contamination. It goes without saying that you should clean your produce before consumption and preparation.

During prep, always start with food cooked at the lowest temperature first, working your way up. For example, chopped scallions are often used as garnish and will be consumed raw, so chop them before potatoes (which you will cook so the risk is lower). Likewise, you would prepare salad greens first.  

The same principle applies when keeping them in the fridge. Don’t stack raw chicken above fish – any juices from the chicken that trickle into the fish would pose a risk. Should the chicken be contaminated with salmonella, the time and temperature at which you would cook fish to perfection is not enough to kill the bacteria.  

Meal 1

This meal plan serves 2 per meal, but this Japanese Beef Curry recipe makes 6-8 servings. This is intentional since the leftovers will be incorporated into the following week’s meals. Store leftovers in an airtight container for up to 5 days and reheat in the microwave as needed. Freeze the leftover beef broth or save some to thin out the curry as it thickens over the next few days! See the full recipe post with tips, tricks, and substitutions here: Easy Instant Pot Japanese Beef Curry.

Print Recipe
No ratings yet

Easy Instant Pot Japanese Beef Curry*

Tender melt-in-your-mouth beef coated in a slightly sweet, slightly savory, and slightly spicy luscious curry sauce. Make this recipe in half the time than its traditional counterpart!
Prep Time15 minutes
Cook Time10 minutes
Pressure Cook Time50 minutes
Total Time1 hour 15 minutes
Course: Curry, Main Course
Cuisine: Japanese
Keyword: comfort food, freezer-friendly recipes, instant pot
Servings: 8
Calories: 577kcal

Equipment

  • Instant Pot
  • Skillet

Ingredients

  • 2 lb well-marbled beef chuck steak excess fat trimmed
  • 3 medium onions thinly sliced
  • 4 cloves garlic minced
  • 1.25 lb carrots cut into even bite-sized pieces
  • 4 oz cremini mushrooms sliced
  • 1 cup red wine or beef stock/water for non-alcoholic
  • 1.5 cups low sodium beef stock
  • 2 large bay leaves
  • 2 Tbsp oil
  • 2 Tbsp unsalted butter
  • 1/4 tsp baking soda optional
  • Salt and pepper

Curry Seasoning:

  • 4 cubes Japanese curry roux chopped or grated
  • 1 Tbsp Worcestershire sauce
  • 2 Tbsp honey
  • 1 Tbsp soy sauce
  • 1 tsp cayenne pepper optional
  • 1 tsp Hershey’s dark cocoa powder

Instructions

Heat the Instant Pot and Skillet:

  • Heat the Instant Pot (IP) on high in sauté mode with butter. Simultaneously, heat a skillet on the stove over high heat.

Sauté Onions and Sear Steak:

  • Sauté onions in the IP with 1/4 tsp salt and pepper and 1/4 tsp baking soda until softened (about 10 mins). Meanwhile, pat dry and season the chuck steak with 1 tsp kosher salt and pepper. In the hot skillet, add 2 tbsp oil, sear each side until brown (2-3 mins per side). As you wait, toss onions occasionally to prevent burning.

Resting the Steak and Deglazing:

  • Transfer the seared steak to a cutting board and rest for 2 mins. Deglaze onions in the Instant Pot with 1 cup red wine (or water). Slice the rested steak into 1.5-inch cubes as alcohol evaporates.

Pressure Cook:

  • Push onions to the sides, add minced garlic, sauté for 30 seconds. Add beef cubes and its juices, 1.5 cups low sodium beef stock, 2 large bay leaves. Close lid, cook on "High" pressure for 20 mins, followed by a 10-min Natural Release.
  • After 10 mins, Quick Release. Add curry seasonings, carrots, and mushrooms in layers. Do NOT stir. Close the lid, cook on high pressure for 1 min, followed by a 5-min Natural Release.
  • Quick release any remaining pressure, set Instant Pot to “sauté” mode. Stir gently to combine the roux and thicken the sauce into a stew-like consistency. Adjust flavors if needed. Serve hot over rice!

Notes

You can freeze leftover beef stock for up to 6 months. Thaw it in the fridge before use.
If you prefer a curry with a thicker consistency, allow it to reduce for 5-10 minutes on sauté mode (medium/normal heat).
A note on potatoes and freezing: If you decide to add potatoes, cut them into small chunks and layer them in this order: seasoning, potatoes, carrots, and then mushrooms. Ideally, the potatoes should be partially submerged. You may also need to add an additional 1 cup of stock to balance the starch from the potatoes, which can act as a thickening agent. Please note that potatoes do not freeze well.

Nutrition

Calories: 577kcal

Meal 2

A picture of a plated tonkatsu curry with a side of shredded cabbage

See the full recipe post with tips, tricks, and substitutions here: Air Fryer Tonkatsu Curry.

Pro tip:

Toast the panko breadcrumbs ahead of time on meal prep day to save some extra minutes the day of! Store toasted panko in an airtight bag or container in the freezer until needed. It stays good for up to 6 months (or longer if there’s no sign of spoilage).
Print Recipe
No ratings yet

Air Fryer Tonkatsu Curry*

The ultimate Japanese comfort food – Japanese tonkatsu curry. This popular dish combines the best of both worlds: crunchy golden tonkatsu and aromatic curry, served over fluffy rice for a satisfying and flavorful experience. Perfect for a delicious weeknight dinner when you have leftover Japanese curry on hand!
Prep Time15 minutes
Cook Time10 minutes
Total Time25 minutes
Course: Curry, Main Course
Cuisine: Asian, Japanese
Keyword: 30 minute recipe, air fryer katsu curry, Japanese katsu curry, Japanese tonkatsu curry, Katsu Curry
Servings: 2
Calories: 800kcal

Equipment

  • Air fryer
  • wok or large skillet

Ingredients

  • 1.5 cup panko breadcrumbs toasted*
  • 2 cup Japanese beef curry
  • 2 pieces 1/2-inch pork chops 4-6 oz each
  • salt and pepper to taste
  • oil for toasting panko about 1.5 Tbsp

Batter:

  • 1 large egg
  • 1 Tbsp kewpie mayo optional
  • 1 Tbsp cornstarch plus more if batter is too thin – should be thick enough to stick onto the filets

To serve:

  • 1/2 cup shredded cabbage optional

Instructions

  • (Can be made ahead) Heat a wok on medium high heat with 1.5 Tbsp oil. Add in the panko and keep stirring with a spatula to toast until golden brown. (About 2-5 minutes. See picture.) Transfer to a large shallow container to cool. Cover and store in the fridge until needed.
  • Whisk the batter together in a bowl until fully incorporated and set aside.
  • Grab a fork or meat tenderizer and puncture holes across the pork chop or chicken breast filet. Season each side of with about 1/8 tsp of kosher salt and a pinch of pepper.*
  • Preheat your air fryer to 375F. Dip the pork into the batter. Let the excess drip off, and then pat the pork chop firmly into the panko so that the panko sticks. Coat all sides with an even layer and shake off any excess crumbs.
  • Spray the basket with cooking oil, lay pork chops in an even layer. Spray another layer of cooking oil onto the pork chops, then air fry for 8-10 minutes flipping once in between cooking.
  • Remove from the air fryer and slice them into strips (about 1/2-inch wide) with a sharp knife. Serve hot and enjoy!

Notes

If subbing pork for chicken breast filet, butterfly the breast to achieve 1/2 inch pieces. You can also pound it with a meat mallet to even out the thickness of the filet.
If you can season meat 12-24 hours ahead, you will yield juicier results. This allows the salt to penetrate the meat to not only season the meat inside-out but to also denature some of the proteins.

Nutrition

Calories: 800kcal

Meal 3

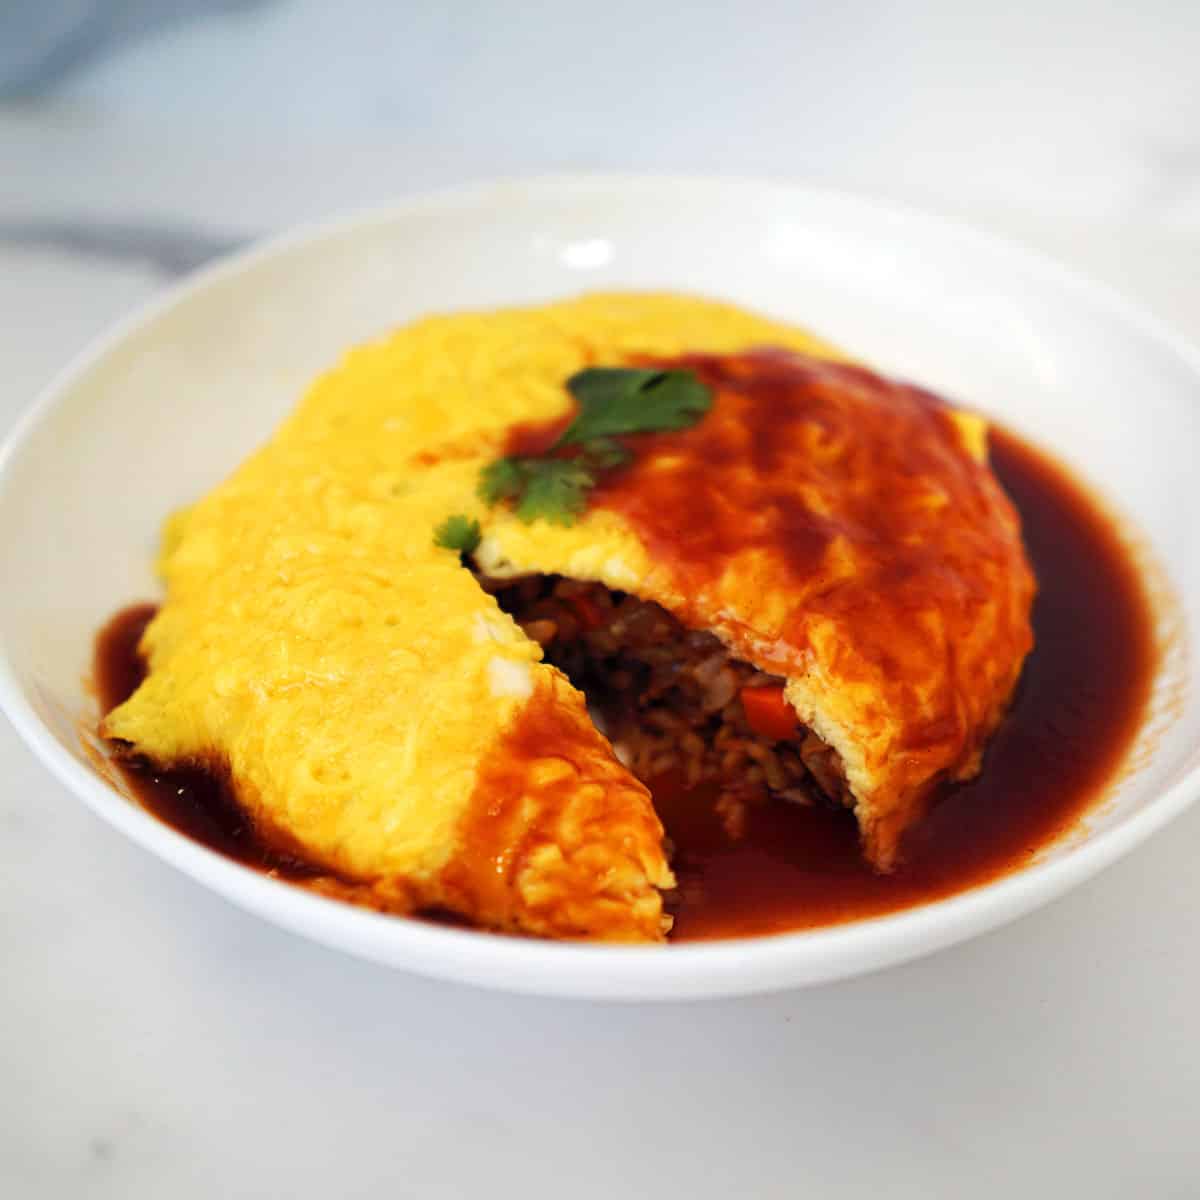
A photo of a plate of omurice drizzled in curry sauce

Running low on beef? No worries! This recipe works fine with just leftover curry sauce. If you notice the sauce has gotten too thick, simply add a little leftover beef broth to thin it out before reheating. See the full recipe post with tips, tricks, and substitutions here: Easy Leftover Curry Omurice.

Print Recipe
No ratings yet

Easy Leftover Curry Omurice*

An effortless way to spruce up humble omurice (while always using up leftovers)!
Prep Time10 minutes
Cook Time20 minutes
Total Time30 minutes
Course: Main Course, Rice Dish
Cuisine: Japanese
Keyword: 30-minute recipes, curry omelet rice, kare omurice
Servings: 2
Calories: 800kcal

Equipment

  • wok/large skillet
  • 8-inch non-stick pan
  • coarse grater optional

Ingredients

  • 1 piece 1/2-inch pork chop or chicken 4-6 oz, cut into 1/2-inch cubes or thin strips
  • 1/4 medium onion diced
  • 3 cloves garlic roughly chopped
  • 1/4 cup frozen peas and carrots
  • 2 cups cooked medium grain rice day-old preferred
  • Cooking oil

Fried Rice Seasoning:

  • 1 cube Japanese curry roux grated with a coarse grater or chopped finely
  • 1/4 tsp sugar optional
  • 2 tsp hot water
  • 2 Tbsp ketchup
  • Salt and pepper to taste

Omelet:

  • 4 large eggs beaten
  • 2 Tbsp butter divided

To serve:

  • 2 tsp chopped parsley optional
  • 2 cup leftover Japanese curry sauce

Instructions

  • Heat 1 Tbsp oil in a wok over medium-high heat. Add meat and cook until 80% done, then add onions and garlic. Stir-fry until onions are soft and the meat is cooked through. Add frozen peas and carrot, and Fried Rice Seasoning. Stir-fry until well combined. Add rice, stir-fry until evenly mixed. Season to taste. Set aside.
  • Melt 1 Tbsp butter in an 8-inch non-stick pan over medium heat. Pour in half the beaten eggs. Scramble while swirling the pan until 80% cooked. Then stop and let the omelet cook untouched the rest of the way till your desired doneness. Remove pan from heat.
  • Slide omelet onto a small bowl (see notes). Place half the fried rice in the center, packed tight. Fold omelet edges over rice. Now, place a plate on top and the bowl over onto the plate. Remove the bowl. Repeat this process for the second serving.
  • Pour curry sauce over omurice. Garnish with parsley if desired. Serve hot and enjoy!

Notes

Prepare all ingredients before starting. Prepare a bowl that can hold half the fried rice for shaping the omelet and the rice.
When making the omelet, be careful not to overcook the eggs as they will become tough and dry. Stop scrambling when the eggs are still slightly runny as they will continue to cook once you fold the omelet.

Nutrition

Calories: 800kcal

If you enjoyed this meal plan, please share it on Instagram, Facebook, TikTok or your favorite social media platform!

Shopping List

checkingredientquantityunitcategorynoteslist type
cayenne pepper1tspcondiments and spicespantry
honey2Tbspcondiments and spicespantry
ketchup2Tbspcondiments and spicespantry
kewpie mayo1Tbspcondiments and spicespantry
soy sauce1Tbspcondiments and spicespantry
sugar0.25tspcondiments and spicespantry
worcestershire sauce1Tbspcondiments and spicespantry
bay leaves2largecondiments and spicespantry
butter2Tbspdairy and misc. refrigerated itemspantry
unsalted butter2Tbspdairy and misc. refrigerated itemspantry
medium grain rice2cupgrainspantry
cornstarch1Tbspmisc. dry goodspantry
panko breadcrumbs1.5cupmisc. dry goodspantry
dark cocoa powder (hershey’s)1tspbakingshopping
japanese curry roux5cubecondiments and spicesshopping
egg5largedairy and misc. refrigerated itemsshopping
frozen peas and carrots0.25cupfrozen foodsshopping
1/2-inch pork chop3piecemeat and seafoodabout 4-6 oz per pieceshopping
well-marbled beef chuck steak2lbmeat and seafoodshopping
carrot1.25lbproduceshopping
cremini mushroom4ozproduceshopping
garlic7cloveproduceshopping
onion3.25mediumproduceshopping
chopped parsley2tspproduceoptionalshopping
low sodium beef stock1.5cupstock or brothshopping

Other 3-day Meal Plans

Hi, I’m Ariel 

I’m a foodie with a simple philosophy: why should amazing food be reserved for the weekends alone? I’m all about making every meal delicious because, let’s face it, we only have so many meals in our lifetime.

My mission? To take the stress out of cooking with easy-to-use meal plans so you can enjoy mouthwatering recipes any day of week. Join me on this tasty journey and let’s savor “more taste, less waste” in every bite!

Leave a Comment

Your email address will not be published. Required Fields are marked *

Hi, I’m Ariel 

I’m a foodie with a simple philosophy: why should amazing food be reserved for the weekends alone? I’m all about making every meal delicious because, let’s face it, we only have so many meals in our lifetime.

My mission? To take the stress out of cooking with easy-to-use meal plans so you can enjoy mouthwatering recipes any day of week. Join me on this tasty journey and let’s savor “more taste, less waste” in every bite!